May 2009 - DRAFT v2
How to Integrate a (wired) Ubuntu 9.04 or 8.10 pc into a Windows Home Network
Objectives of this Guide
To have a Ubuntu PC fully integrated with a pre-existing home network of Windows pc's, & capable of two-way file transfers, and media streaming.
Who is this guide intended for?
It is intended to be a practical basic guide for interested PC users, as opposed to technically trained people.
The guide assumes a reasonable 'experienced user' knowledge of:
- Windows File & Folder usage
- Setting up a small home network of Windows pc's that can share files, an internet connection, & printer.
Some rudimentary user knowledge of Ubuntu: installation, files & folders.
Pre-conditions for Success using this guide
A pre-existing peer-to-peer home Windows network with a broadband modem/router & a basic hub, using wired network connections, that can already share files, connect to the internet, & print.
It is assumed that the Windows pc's 'Obtain their IP Addresses Automatically' from the modem/router.
The
use of Ubuntu 8.10 or 9.04
Provenance of this Guide
This guide is distilled from my notes of around 50 installations of various Ubuntu releases over 3 years on various pc's, as I learned how to 'transparently' integrate Ubuntu based pc's into my home network of 6 Windows pc's
The notes & settings in this guide are the actual ones used to configure Ubuntu pc's that are fully integrated on my network right now, and doing useful work. I tested this guide by following it exactly as it is written on fresh installations.
I am certain that there is room for
improvement in the process, but for now it is reasonably straightforward,
repeatable, and lets me get on with using, learning about & evaluating
Ubuntu Linux in a practical situation.
Overview of the Process
Step 1 - Install Ubuntu, update the installation, check basic functionality & internet connection
Step 2 - Create a folder in Ubuntu & prepare it for sharing on the network (which installs SAMBA...)
Step 3 - Access the Ubuntu pc from a Windows pc on your network
Step 1 - Install Ubuntu 8.10 or 9.04
After a basic install while connected to your pre-existing Windows network, internet access from the Ubuntu PC should work straight away.
Internet access by the
Ubuntu PC is essential to this process. Do not proceed unless it is
working.
By default, a lot of networking
capability on the Ubuntu machine is already working:
On the bar at the top of the Ubuntu desktop, in Places > Network, you will see the 'Windows Network' icon.- see note 1
You will also see icons for each of the pc's on your network.
D/clicking on the icon of a pc will display its shared folders.
When you D/click on a shared folder, it's contents are displayed, and a shortcut to the Windows shared folder will appear on the Ubuntu desktop.
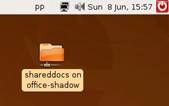
This shortcut will be removed automatically at the next reboot, or it can removed by right-clicking on it & selecting Unmount Volume
However, the Ubuntu pc cannot be seen from the
Windows pc's.
The rest of this
guide shows how to make the Ubuntu pc visible to & accessible by the Windows
pcs on your home network.
===========================================================================
Step 2 - Create a folder in Ubuntu to become visible on the
network & prepare it for Sharing.
You could think of this new folder becoming your Ubuntu equivalent of the 'Shared Documents' folder in Windows.
Right-click on the Ubuntu desktop & create the new folder called, say, 810 Shared
Right-click on the 810 Shared folder,
and select Sharing Options
After a short delay, a dialog saying' Sharing Service is not installed' will appear.
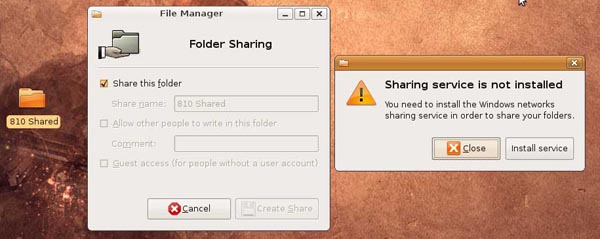
Click on Install Service
Ubuntu will ask for your login password
This will cause a program called Samba to be downloaded from the internet & installed
Wait for the installation to complete with the message Changes Applied, then close the dialog.
NOW REBOOT THE UBUNTU PC I know you shouldnt have to, but I have
found this to be essential on some installations, so why not
.
Right-click on the 810 Shared
folder, and select Sharing
Options
The dialog saying Folder Sharing will re-appear, with more options now available:
Select the Share this Folder' & 'Allow other people to write in this folder boxes
Click on Create Share.
A dialog Nautilus needs to add some permissions .. appears.
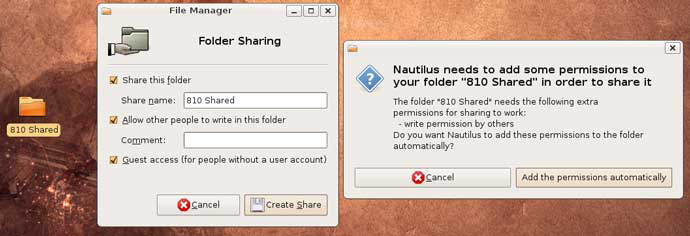
Click on Add the permissions automatically
The icon for the shared folder will now change to indicate sharing by displaying a double arrow:
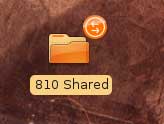
At this point, the Ubuntu PC will become
visible to Windows PCs on the network:
===========================================================================
Step 3 - Access the Ubuntu pc from a Windows pc.
On a Windows XP PC, go to 'My Network Places' > 'View Workgroup Computers'
The Ubuntu PC icon will be shown, and when clicking on it a password is requested.
Enter the login name & password of the Ubuntu PC you are connecting to:
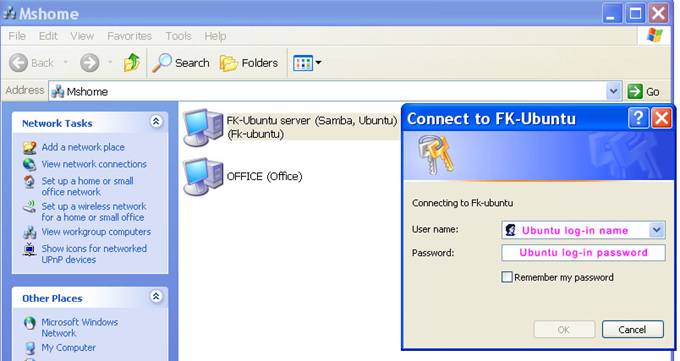
You can then see & access the Ubuntu shared folder you created in step 2. Job done!
===========================================================================
Note 1
D/clicking on the 'Windows Network' icon will take you to [the name of your windows network], in my case mshome
I do not pretend to understand this apparent duplication....
NB: Depending on how your windows network is configured, you may want to make changes to the Windows workgroup names in use by the pcs on the network, to keep the entire network in the same workgroup see the About Windows Workgroups guide via the home page
===========================================================================